
You've built a deployment pipeline that runs tests, lints code, and builds assets—but broken links still slip through to production. Your automated checks validate everything except the one thing users interact with most: the links themselves.
By the time you discover a critical download link is returning 404s, the damage is done. Support tickets pile up. Users bounce. SEO rankings drop. Manual link checking after every deploy doesn't scale when you're shipping multiple times per day.
This guide shows you how to integrate link monitoring into your existing workflows using the DeadLinkRadar API. You'll learn to catch broken links before deployment, build custom monitoring dashboards, and automate workflows that currently eat hours of manual work every week.
What You'll Need Before Getting Started
Before we dive into automation patterns and code examples, make sure you have everything ready to follow along and get the most value from this guide:
-
DeadLinkRadar Business plan account — API access is a Business plan exclusive feature. If you're on the Free plan, you'll need to upgrade to access programmatic link checking. The Business plan includes higher rate limits and additional features designed for teams and developers.
-
Basic API authentication knowledge — You should understand how Bearer token authentication works and how to set environment variables in your deployment environment. If you've worked with any REST API before (Stripe, GitHub, Twilio), you'll feel right at home.
-
Access to your deployment environment — Whether you're using GitHub Actions, GitLab CI, Jenkins, or another CI/CD platform, you'll need permission to add secrets and modify pipeline configurations.
-
Time estimate: 15-20 minutes — This depends on how familiar you are with your CI/CD platform. GitHub Actions integration typically takes 10 minutes. Custom integrations may take longer depending on your requirements.
Don't have a Business plan yet? No problem! You can upgrade directly from your dashboard settings, and API access activates immediately—no waiting period.
Understanding DeadLinkRadar's REST API
Manual link checking doesn't scale. Whether you're managing hundreds of URLs across multiple projects or maintaining a content site with dynamic links, clicking through lists and manually verifying status codes wastes valuable development time.
Here's the good news: the DeadLinkRadar API gives you programmatic access to the same link checking capabilities you use in the dashboard, but with the flexibility to integrate monitoring into any workflow, tool, or custom application you're building.
What the API Enables
The DeadLinkRadar API is a RESTful interface that lets you:
- Check links programmatically — Verify single links or check hundreds in bulk without touching the dashboard
- Retrieve link status — Query current health, historical check data, and performance metrics
- Automate monitoring — Trigger checks from CI/CD pipelines, scheduled jobs, or webhook events
- Build custom dashboards — Pull link health data into your own monitoring systems (Datadog, Grafana, custom admin panels)
- Integrate with external tools — Connect link monitoring to your existing workflow (Jira, Linear, Slack, PagerDuty)
Business Plan Requirement
API access is exclusive to Business plan subscribers. This isn't an arbitrary limitation—it's designed to ensure our infrastructure can handle automated, high-volume requests while maintaining fast response times for all users.
Business plan rate limits:
- 10,000 requests per hour
- 100 concurrent link checks
- Priority queue processing
- Dedicated support for integration questions
Free and Pro plans focus on dashboard-based monitoring with scheduled automated checks. Business plans unlock programmatic access for teams that need to integrate link monitoring into existing systems.
Key API Capabilities
Authentication model: API key-based authentication using Bearer tokens. Each key can be revoked and rotated independently, giving you fine-grained control over access. Create separate keys for different environments (production, staging, development) or different team members.
Response format: All endpoints return JSON with consistent structure. Successful responses include the data you requested plus metadata (timestamps, pagination info, rate limit headers). Error responses use standard HTTP status codes with descriptive messages.
Rate limiting: Headers tell you exactly how many requests remain in your current window (X-RateLimit-Remaining) and when it resets (X-RateLimit-Reset). Hit the limit and you'll get a 429 Too Many Requests with a Retry-After header indicating when to retry.
Webhook support: Configure webhooks to receive real-time notifications when link status changes. No need to poll—we'll push updates to your endpoint the moment something breaks or recovers.

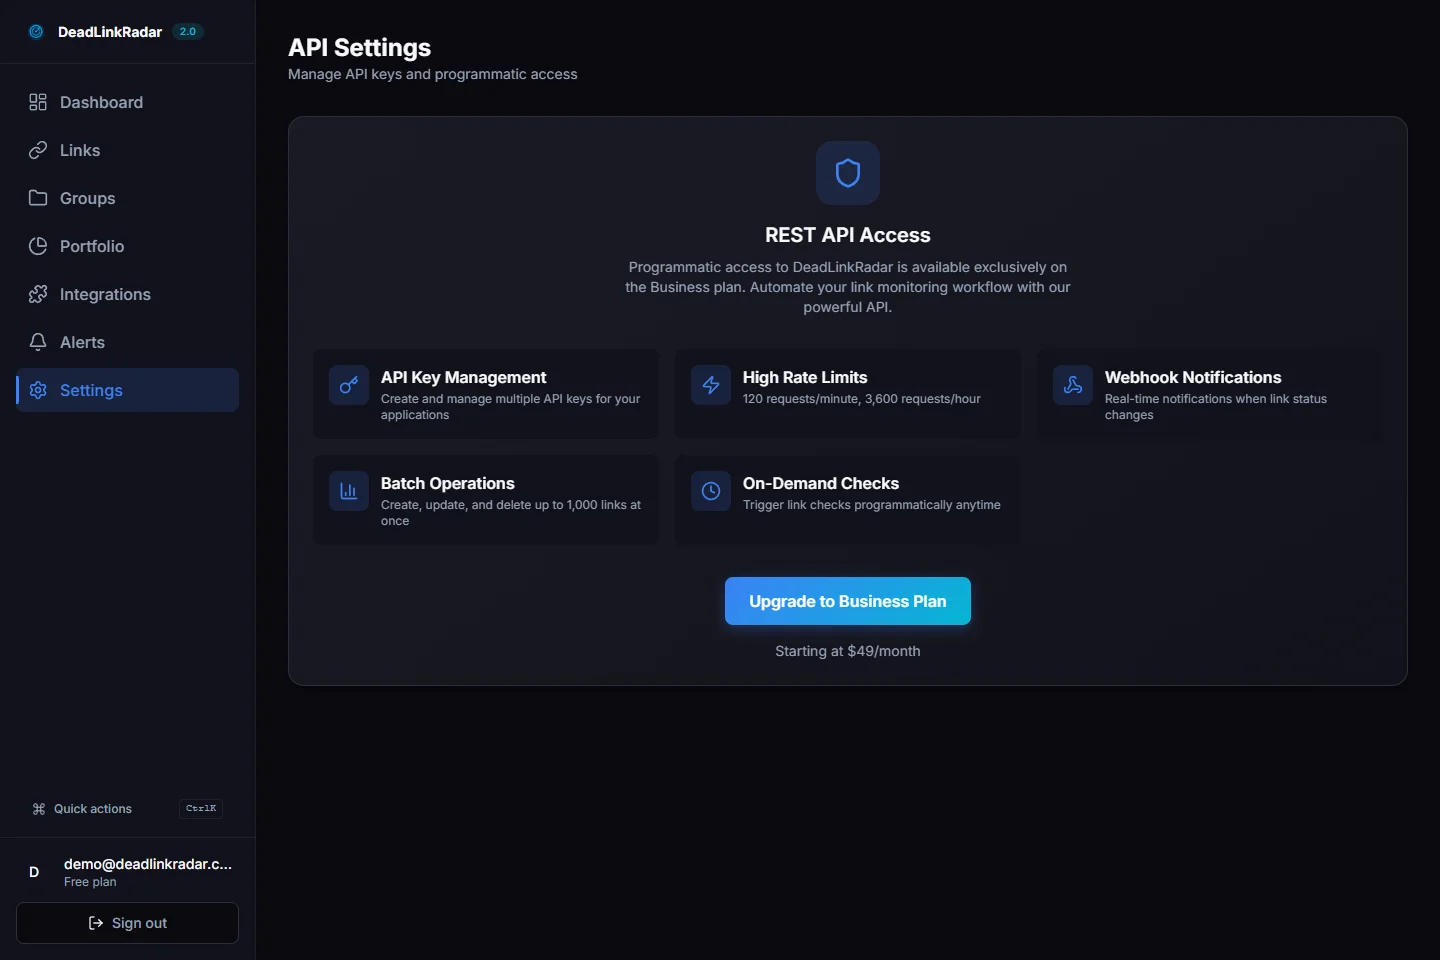
DeadLinkRadar API settings page with key management controls (click to view full size)
Getting Your API Key
Every API request requires authentication. API keys act as your credentials—they identify you and enforce rate limits based on your plan. Here's how to generate your first key and manage them securely.
Step-by-Step Key Generation
1. Navigate to API Settings
From your dashboard, go to Settings → API. You'll see your current usage stats and any existing API keys (if you've created them before).
If you're on a Free or Pro plan, you'll see an upgrade prompt instead. Business plan required for API access.
2. Create a New API Key
Click "Generate New API Key". You'll be prompted to give your key a descriptive name—this helps you identify which key belongs to which environment or team member when you're managing multiple keys.
Naming convention recommendations:
production-server(production environment)github-actions-ci(CI/CD pipeline)john-dev-laptop(individual developer machine)staging-api(staging environment)
3. Copy and Store Your Key Immediately
Once generated, your API key displays exactly once. Copy it immediately and store it in your password manager or secrets vault. If you lose it, you'll need to revoke and regenerate—there's no way to retrieve a key after closing the modal.
Your key format: dlr_sk_live_xxxxxxxxxxxxxxxxxxxxxxxxxxxxxxxx (production) or dlr_sk_test_xxxxxxxxxxxxxxxxxxxxxxxxxxxxxxxx (test mode, if enabled).

API key generation flow showing secure key display (click to view full size)
Security Best Practices
Never commit API keys to version control. Even private repositories can leak keys through accidental public forks, security breaches, or oversharing access. Use environment variables instead:
# .env (add to .gitignore)
DEADLINKRADAR_API_KEY=dlr_sk_live_xxxxxxxxxxxxxxxxxxxxxxxxxxxxxxxx
Use separate keys for different environments. If your staging key gets compromised, you can revoke it without affecting production. Name your keys clearly so you know which environment they belong to.
Rotate keys regularly. Set a calendar reminder to rotate API keys every 90 days, especially for production environments. Generate a new key, update your environment variables, test that everything works, then revoke the old key.
Limit key scope when possible. If a specific integration only needs read access, create a dedicated key for that purpose. Future API versions will support scoped permissions—for now, all keys have full account access.
Key Rotation Workflow
Safe key rotation (zero downtime):
- Generate new API key with descriptive name (e.g.,
production-server-2026-01) - Update environment variables in your deployment platform (don't deploy yet)
- Verify new key works with a test request
- Deploy updated configuration
- Monitor for errors (check logs, error tracking)
- Once confirmed stable (24 hours recommended), revoke old key
This approach ensures you always have a working key in production. Never revoke before confirming the new key works.
Making Your First API Call
Now that you have your API key, let's make your first request. We'll check the status of a single link using three different languages: curl (universal), JavaScript (Node.js), and Python. Choose whichever fits your stack.
Authentication Header Format
All API requests require a Bearer token in the Authorization header:
Authorization: Bearer dlr_sk_live_xxxxxxxxxxxxxxxxxxxxxxxxxxxxxxxxNo additional authentication needed. This single header identifies you, enforces rate limits, and determines which links you have access to.
Example: Check Single Link Status
Endpoint: GET https://api.deadlinkradar.com/v1/links/:id/status
Replace :id with your link ID (found in the dashboard URL when viewing a specific link, e.g., /dashboard/links/abc123).
curl Example
curl -X GET \
  'https://api.deadlinkradar.com/v1/links/abc123/status' \
  -H 'Authorization: Bearer dlr_sk_live_xxxxxxxxxxxxxxxxxxxxxxxxxxxxxxxx' \
  -H 'Content-Type: application/json'
JavaScript/Node.js Example (fetch)
const DEADLINKRADAR_API_KEY = process.env.DEADLINKRADAR_API_KEY

async function checkLinkStatus(linkId) {
  const response = await fetch(
    `https://api.deadlinkradar.com/v1/links/${linkId}/status`,
    {
      method: 'GET',
      headers: {
        'Authorization': `Bearer ${DEADLINKRADAR_API_KEY}`,
        'Content-Type': 'application/json',
      },
    }
  )

  if (!response.ok) {
    throw new Error(`API error: ${response.status} ${response.statusText}`)
  }

  const data = await response.json()
  return data
}

// Usage
checkLinkStatus('abc123')
  .then(status => console.log('Link status:', status))
  .catch(error => console.error('Error:', error))
JavaScript/Node.js Example (axios)
const axios = require('axios')

const api = axios.create({
  baseURL: 'https://api.deadlinkradar.com/v1',
  headers: {
    'Authorization': `Bearer ${process.env.DEADLINKRADAR_API_KEY}`,
    'Content-Type': 'application/json',
  },
})

async function checkLinkStatus(linkId) {
  try {
    const response = await api.get(`/links/${linkId}/status`)
    return response.data
  } catch (error) {
    console.error('API Error:', error.response?.data || error.message)
    throw error
  }
}
Python Example (requests library)
import os
import requests

DEADLINKRADAR_API_KEY = os.environ['DEADLINKRADAR_API_KEY']
API_BASE_URL = 'https://api.deadlinkradar.com/v1'

def check_link_status(link_id):
    headers = {
        'Authorization': f'Bearer {DEADLINKRADAR_API_KEY}',
        'Content-Type': 'application/json',
    }

    response = requests.get(
        f'{API_BASE_URL}/links/{link_id}/status',
        headers=headers
    )

    response.raise_for_status()  # Raises HTTPError for bad responses
    return response.json()

# Usage
try:
    status = check_link_status('abc123')
    print('Link status:', status)
except requests.exceptions.HTTPError as error:
    print(f'API Error: {error.response.status_code} {error.response.text}')
Response Format
Successful response (200 OK):
{
  "id": "abc123",
  "url": "https://example.com/download",
  "status": "active",
  "last_checked_at": "2026-01-06T10:30:00Z",
  "response_time_ms": 245,
  "http_status_code": 200,
  "checks_performed": 42,
  "uptime_percentage": 98.5
}
Key fields:
status— Current link health:"active"(working),"dead"(broken),"warning"(intermittent),"checking"(in progress)last_checked_at— ISO 8601 timestamp of most recent checkresponse_time_ms— Latest response time in millisecondshttp_status_code— HTTP status from last check (200, 404, 500, etc.)uptime_percentage— Historical uptime over last 30 days

API response structure in browser DevTools (click to view full size)
Common Error Codes
The API uses standard HTTP status codes to indicate success or failure:
401 Unauthorized:
{
  "error": "Invalid API key",
  "message": "The provided API key is invalid or has been revoked"
}
Cause: Missing, malformed, or revoked API key Solution: Verify your key is correct, regenerate if needed
429 Too Many Requests:
{
  "error": "Rate limit exceeded",
  "message": "You have exceeded your rate limit of 10,000 requests per hour",
  "retry_after": 3600
}
Cause: Exceeded rate limit (10,000 requests/hour for Business plan) Solution: Implement exponential backoff, cache responses, or upgrade plan
404 Not Found:
{
  "error": "Link not found",
  "message": "No link found with ID abc123"
}
Cause: Invalid link ID or link belongs to different account Solution: Verify link ID, ensure you're using correct API key
503 Service Unavailable:
{
  "error": "Service temporarily unavailable",
  "message": "We're experiencing high load. Please retry in 60 seconds"
}
Cause: Temporary service disruption (rare) Solution: Implement retry with exponential backoff, check status page
CI/CD Integration Examples
Catching broken links before they reach production is where the API really shines. Instead of discovering dead links from angry users, your deployment pipeline fails fast and blocks merges until links are verified. Here's how to integrate link checking into three popular CI/CD platforms.
GitHub Actions Integration
GitHub Actions is the most popular CI/CD platform for open source and private repositories. This example shows how to add a link check step to your existing workflow that runs before deployment.
Workflow File Structure
Create .github/workflows/check-links.yml in your repository:
name: Check Links Before Deploy

on:
  pull_request:
    branches: [main, master]
  push:
    branches: [main, master]

jobs:
  check-links:
    name: Verify All Links
    runs-on: ubuntu-latest

    steps:
      - name: Checkout code
        uses: actions/checkout@v4

      - name: Setup Node.js
        uses: actions/setup-node@v4
        with:
          node-version: '20'

      - name: Install dependencies
        run: npm install axios

      - name: Check links via DeadLinkRadar API
        env:
          DEADLINKRADAR_API_KEY: ${{ secrets.DEADLINKRADAR_API_KEY }}
        run: node scripts/check-links.js

      - name: Fail if broken links found
        if: failure()
        run: |
          echo "❌ Broken links detected! Fix them before deploying."
          exit 1
Link Check Script
Create scripts/check-links.js:
const axios = require('axios')

const API_KEY = process.env.DEADLINKRADAR_API_KEY
const API_BASE_URL = 'https://api.deadlinkradar.com/v1'

const api = axios.create({
  baseURL: API_BASE_URL,
  headers: {
    'Authorization': `Bearer ${API_KEY}`,
    'Content-Type': 'application/json',
  },
})

async function checkAllLinks() {
  console.log('🔍 Fetching all monitored links...')

  try {
    // Get all links for your account
    const response = await api.get('/links')
    const links = response.data.links

    console.log(`Found ${links.length} links to check\n`)

    let brokenLinks = []

    for (const link of links) {
      const status = await api.get(`/links/${link.id}/status`)
      const linkStatus = status.data.status

      const icon = linkStatus === 'active' ? '✅' : '❌'
      console.log(`${icon} ${link.url} - ${linkStatus}`)

      if (linkStatus === 'dead' || linkStatus === 'warning') {
        brokenLinks.push(link)
      }
    }

    console.log(`\n📊 Results: ${brokenLinks.length} broken, ${links.length - brokenLinks.length} working`)

    if (brokenLinks.length > 0) {
      console.error('\n❌ Broken links detected:')
      brokenLinks.forEach(link => {
        console.error(`  - ${link.url}`)
      })
      process.exit(1)  // Fail the build
    }

    console.log('\n✅ All links are healthy!')
  } catch (error) {
    console.error('API Error:', error.response?.data || error.message)
    process.exit(1)
  }
}

checkAllLinks()
Secrets Management
Add your API key to GitHub repository secrets:
- Go to Settings → Secrets and variables → Actions
- Click New repository secret
- Name:
DEADLINKRADAR_API_KEY - Value:
dlr_sk_live_xxxxxxxxxxxxxxxxxxxxxxxxxxxxxxxx - Click Add secret
Now your workflow can access the key via ${{ secrets.DEADLINKRADAR_API_KEY }} without exposing it in logs or code.
GitHub Actions workflow configured for automated link checking (click to view full size)
GitLab CI Integration
GitLab CI uses a .gitlab-ci.yml file in your repository root. This example adds a link-check stage that runs before deployment.
stages:
  - test
  - link-check
  - deploy

check-links:
  stage: link-check
  image: node:20-alpine
  before_script:
    - npm install -g axios
  script:
    - node scripts/check-links.js
  variables:
    DEADLINKRADAR_API_KEY: $DEADLINKRADAR_API_KEY
  allow_failure: false  # Block deploy if links are broken
  only:
    - main
    - master
CI/CD Variables Setup:
- Go to Settings → CI/CD → Variables
- Click Add variable
- Key:
DEADLINKRADAR_API_KEY - Value:
dlr_sk_live_xxxxxxxxxxxxxxxxxxxxxxxxxxxxxxxx - Flags: Check Protect variable and Mask variable
- Click Add variable
Use the same scripts/check-links.js from the GitHub Actions example.
Jenkins Integration
Jenkins uses Jenkinsfile for pipeline definitions. This example shows a declarative pipeline with a link check stage.
pipeline {
  agent any

  environment {
    DEADLINKRADAR_API_KEY = credentials('deadlinkradar-api-key')
  }

  stages {
    stage('Checkout') {
      steps {
        checkout scm
      }
    }

    stage('Install Dependencies') {
      steps {
        sh 'npm install axios'
      }
    }

    stage('Check Links') {
      steps {
        script {
          def linkCheckResult = sh(
            script: 'node scripts/check-links.js',
            returnStatus: true
          )

          if (linkCheckResult != 0) {
            error('❌ Broken links detected! Fix them before deploying.')
          }
        }
      }
    }

    stage('Deploy') {
      when {
        branch 'main'
      }
      steps {
        sh './deploy.sh'
      }
    }
  }

  post {
    failure {
      echo '❌ Pipeline failed - check link status'
    }
    success {
      echo '✅ All links verified, deployment successful'
    }
  }
}
Credentials Setup:
- Go to Manage Jenkins → Manage Credentials
- Select appropriate domain (usually (global))
- Click Add Credentials
- Kind: Secret text
- Secret:
dlr_sk_live_xxxxxxxxxxxxxxxxxxxxxxxxxxxxxxxx - ID:
deadlinkradar-api-key - Description:
DeadLinkRadar API Key - Click OK
Bulk Operations & Advanced Patterns
Checking links one-by-one works for small projects, but what if you're monitoring hundreds or thousands of URLs? Bulk operations let you verify multiple links in a single request, significantly reducing API calls and speeding up your workflows.
Batch Link Checking
Endpoint: POST https://api.deadlinkradar.com/v1/links/check-batch
Request body:
{
  "link_ids": ["abc123", "def456", "ghi789"],
  "async": false
}
Parameters:
link_ids— Array of link IDs to check (max 100 per request)async— Iftrue, returns immediately and processes checks in background; iffalse, waits for all checks to complete before returning
Response (synchronous):
{
  "total": 3,
  "active": 2,
  "dead": 1,
  "results": [
    {
      "id": "abc123",
      "url": "https://example.com/download",
      "status": "active",
      "response_time_ms": 245
    },
    {
      "id": "def456",
      "url": "https://example.com/video",
      "status": "active",
      "response_time_ms": 312
    },
    {
      "id": "ghi789",
      "url": "https://example.com/expired",
      "status": "dead",
      "http_status_code": 404
    }
  ]
}
Node.js Batch Check Script
This script shows how to implement batch checking with error handling and retry logic:
const axios = require('axios')

const API_KEY = process.env.DEADLINKRADAR_API_KEY
const API_BASE_URL = 'https://api.deadlinkradar.com/v1'

const api = axios.create({
  baseURL: API_BASE_URL,
  headers: {
    'Authorization': `Bearer ${API_KEY}`,
    'Content-Type': 'application/json',
  },
})

// Chunk array into batches of N items
function chunk(array, size) {
  const chunks = []
  for (let i = 0; i < array.length; i += size) {
    chunks.push(array.slice(i, i + size))
  }
  return chunks
}

// Exponential backoff retry
async function retryWithBackoff(fn, maxRetries = 3) {
  for (let attempt = 0; attempt < maxRetries; attempt++) {
    try {
      return await fn()
    } catch (error) {
      if (error.response?.status === 429 && attempt < maxRetries - 1) {
        const waitTime = Math.pow(2, attempt) * 1000  // 1s, 2s, 4s
        console.log(`Rate limited. Retrying in ${waitTime}ms...`)
        await new Promise(resolve => setTimeout(resolve, waitTime))
      } else {
        throw error
      }
    }
  }
}

async function checkLinksInBatches(linkIds) {
  const batches = chunk(linkIds, 100)  // API limit: 100 per request
  const allResults = []

  console.log(`Checking ${linkIds.length} links in ${batches.length} batches...`)

  for (let i = 0; i < batches.length; i++) {
    console.log(`\nBatch ${i + 1}/${batches.length}`)

    const results = await retryWithBackoff(async () => {
      const response = await api.post('/links/check-batch', {
        link_ids: batches[i],
        async: false
      })
      return response.data.results
    })

    allResults.push(...results)

    const active = results.filter(r => r.status === 'active').length
    const dead = results.filter(r => r.status === 'dead').length
    console.log(`✅ ${active} active, ❌ ${dead} broken`)
  }

  return allResults
}

// Usage example
const linkIds = ['abc123', 'def456', 'ghi789', /* ... hundreds more ... */]

checkLinksInBatches(linkIds)
  .then(results => {
    const broken = results.filter(r => r.status === 'dead')
    if (broken.length > 0) {
      console.error('\n❌ Broken links:')
      broken.forEach(link => console.error(`  - ${link.url}`))
      process.exit(1)
    }
    console.log('\n✅ All links healthy!')
  })
  .catch(error => {
    console.error('Error:', error.message)
    process.exit(1)
  })
Filtering Links by Group
If you organize links into groups (e.g., by project, client, or website), you can check all links in a specific group:
Endpoint: GET https://api.deadlinkradar.com/v1/groups/:group_id/links
Query parameters:
status— Filter by status:active,dead,warninglimit— Max results per page (default: 50, max: 100)offset— Pagination offset
Example request:
curl -X GET \
  'https://api.deadlinkradar.com/v1/groups/grp_abc123/links?status=dead&limit=100' \
  -H 'Authorization: Bearer dlr_sk_live_xxxxxxxxxxxxxxxxxxxxxxxxxxxxxxxx'
Response:
{
  "group_id": "grp_abc123",
  "group_name": "Production Downloads",
  "total": 245,
  "dead": 3,
  "links": [
    {
      "id": "link_xyz",
      "url": "https://example.com/expired-file",
      "status": "dead",
      "last_checked_at": "2026-01-06T10:30:00Z"
    }
  ],
  "pagination": {
    "limit": 100,
    "offset": 0,
    "has_more": false
  }
}
Retrieving Historical Check Data
Track link health trends over time by fetching historical check records:
Endpoint: GET https://api.deadlinkradar.com/v1/links/:id/history
Query parameters:
from— Start date (ISO 8601):2026-01-01T00:00:00Zto— End date (ISO 8601):2026-01-06T23:59:59Zlimit— Max results (default: 100, max: 500)
Response:
{
  "link_id": "abc123",
  "url": "https://example.com/download",
  "checks": [
    {
      "timestamp": "2026-01-06T10:30:00Z",
      "status": "active",
      "response_time_ms": 245,
      "http_status_code": 200
    },
    {
      "timestamp": "2026-01-05T10:30:00Z",
      "status": "dead",
      "response_time_ms": null,
      "http_status_code": 404
    }
  ],
  "summary": {
    "total_checks": 42,
    "uptime_percentage": 95.2,
    "avg_response_time_ms": 312
  }
}
Webhook Notifications
Instead of polling for status changes, configure webhooks to receive real-time notifications:
Endpoint: POST https://api.deadlinkradar.com/v1/webhooks
Request body:
{
  "url": "https://your-server.com/webhooks/deadlinkradar",
  "events": ["link.status_changed", "link.slow_response"],
  "secret": "your_webhook_secret"
}
Webhook payload (sent to your endpoint):
{
  "event": "link.status_changed",
  "timestamp": "2026-01-06T10:30:00Z",
  "data": {
    "link_id": "abc123",
    "url": "https://example.com/download",
    "previous_status": "active",
    "current_status": "dead",
    "http_status_code": 404
  },
  "signature": "sha256=xxxxxx"  // HMAC-SHA256 for verification
}
Verify webhook signature (Node.js):
const crypto = require('crypto')

function verifyWebhookSignature(payload, signature, secret) {
  const hmac = crypto.createHmac('sha256', secret)
  const expectedSignature = 'sha256=' + hmac.update(payload).digest('hex')
  return crypto.timingSafeEqual(
    Buffer.from(signature),
    Buffer.from(expectedSignature)
  )
}

// Express.js endpoint
app.post('/webhooks/deadlinkradar', (req, res) => {
  const signature = req.headers['x-deadlinkradar-signature']
  const payload = JSON.stringify(req.body)

  if (!verifyWebhookSignature(payload, signature, process.env.WEBHOOK_SECRET)) {
    return res.status(401).send('Invalid signature')
  }

  const { event, data } = req.body

  if (event === 'link.status_changed' && data.current_status === 'dead') {
    console.log(`🚨 ALERT: ${data.url} is broken!`)
    // Send Slack notification, create Jira ticket, etc.
  }

  res.status(200).send('OK')
})
Caching Strategies
Reduce API calls by caching successful checks. Links rarely break within minutes or hours—checking the same link 100 times per hour wastes rate limit quota.
Simple time-based caching (Node.js):
const cache = new Map()
const CACHE_TTL = 60 * 60 * 1000  // 1 hour

async function checkLinkWithCache(linkId) {
  const now = Date.now()
  const cached = cache.get(linkId)

  if (cached && (now - cached.timestamp) < CACHE_TTL) {
    console.log(`Cache hit for ${linkId}`)
    return cached.data
  }

  console.log(`Cache miss for ${linkId}, fetching from API...`)
  const response = await api.get(`/links/${linkId}/status`)
  const data = response.data

  cache.set(linkId, {
    data,
    timestamp: now
  })

  return data
}
When to cache:
- ✅ Links checked frequently (CI/CD runs, scheduled jobs)
- ✅ Status is
active(broken links need frequent verification) - ❌ Critical links that need real-time monitoring
- ❌ Links that just recovered (verify stability first)
Real-World Use Cases
Now that you understand the API mechanics, let's look at three common scenarios where automated link monitoring solves real problems teams face every day.
Use Case 1: Pre-Deployment Validation
Problem: Broken links slip through code review and QA, only discovered after deployment when users start reporting 404 errors.
Solution: Add link verification as a required CI/CD step. The build fails if any monitored link returns an error, blocking merge until fixed.
Implementation:
# .github/workflows/deploy.yml
jobs:
  verify-links:
    name: Pre-Deploy Link Check
    runs-on: ubuntu-latest
    steps:
      - name: Check all production links
        run: |
          npm install axios
          node scripts/check-links.js
        env:
          DEADLINKRADAR_API_KEY: ${{ secrets.DEADLINKRADAR_API_KEY }}

  deploy:
    needs: verify-links  # Only runs if link check passes
    runs-on: ubuntu-latest
    steps:
      - name: Deploy to production
        run: ./deploy.sh
Benefits:
- Catch broken links before users do
- Automatic failure = no manual remember-to-check-links overhead
- Clear signal in PR status checks: green = safe to merge
Team notification on failure:
// In check-links.js
if (brokenLinks.length > 0) {
  await fetch(process.env.SLACK_WEBHOOK_URL, {
    method: 'POST',
    headers: { 'Content-Type': 'application/json' },
    body: JSON.stringify({
      text: `🚨 Deployment blocked: ${brokenLinks.length} broken links detected`,
      attachments: [{
        color: 'danger',
        fields: brokenLinks.map(link => ({
          title: link.url,
          value: `Status: ${link.status}`,
          short: false
        }))
      }]
    })
  })

  process.exit(1)
}
Use Case 2: Custom Monitoring Dashboard
Problem: Your team uses multiple tools (Datadog, Grafana, internal admin panel) for infrastructure monitoring, but link health lives in a separate dashboard.
Solution: Pull link health data into your existing monitoring system using the API. Centralize all health metrics in one place.
Example: Datadog Custom Metric
const { StatsD } = require('hot-shots')
const axios = require('axios')

const dogstatsd = new StatsD({
  host: 'localhost',
  port: 8125
})

async function reportLinkMetrics() {
  const api = axios.create({
    baseURL: 'https://api.deadlinkradar.com/v1',
    headers: {
      'Authorization': `Bearer ${process.env.DEADLINKRADAR_API_KEY}`,
      'Content-Type': 'application/json',
    },
  })

  // Fetch all links
  const response = await api.get('/links')
  const links = response.data.links

  // Calculate metrics
  const total = links.length
  const active = links.filter(l => l.status === 'active').length
  const dead = links.filter(l => l.status === 'dead').length
  const uptimePercentage = (active / total) * 100

  // Send to Datadog
  dogstatsd.gauge('deadlinkradar.links.total', total)
  dogstatsd.gauge('deadlinkradar.links.active', active)
  dogstatsd.gauge('deadlinkradar.links.dead', dead)
  dogstatsd.gauge('deadlinkradar.uptime_percentage', uptimePercentage)

  console.log(`📊 Metrics sent: ${active}/${total} active (${uptimePercentage.toFixed(1)}% uptime)`)
}

// Run every 5 minutes
setInterval(reportLinkMetrics, 5 * 60 * 1000)
reportLinkMetrics()  // Run immediately on start
Benefits:
- Unified monitoring dashboard (infrastructure + link health)
- Historical trend visualization
- Alert on uptime drop below threshold
- Team already knows how to use existing tools
Use Case 3: Scheduled Maintenance Reports
Problem: Stakeholders need weekly link health reports but don't have dashboard access. Manually exporting data wastes 30 minutes every Friday.
Solution: Automated weekly report that fetches data via API and emails stakeholders with a summary.
Example: Weekly Email Report
const nodemailer = require('nodemailer')
const axios = require('axios')

async function sendWeeklyReport() {
  const api = axios.create({
    baseURL: 'https://api.deadlinkradar.com/v1',
    headers: {
      'Authorization': `Bearer ${process.env.DEADLINKRADAR_API_KEY}`,
      'Content-Type': 'application/json',
    },
  })

  // Fetch link summary
  const response = await api.get('/links/summary')
  const { total, active, dead, warning } = response.data

  // Fetch broken links
  const brokenResponse = await api.get('/links?status=dead')
  const brokenLinks = brokenResponse.data.links

  // Create email
  const transporter = nodemailer.createTransport({
    host: process.env.SMTP_HOST,
    port: 587,
    secure: false,
    auth: {
      user: process.env.SMTP_USER,
      pass: process.env.SMTP_PASS,
    },
  })

  const emailHtml = `
    <h1>Weekly Link Health Report</h1>
    <p><strong>Report Date:</strong> ${new Date().toLocaleDateString()}</p>

    <h2>Summary</h2>
    <ul>
      <li>Total Links: ${total}</li>
      <li>Active: ${active} (${((active/total)*100).toFixed(1)}%)</li>
      <li>Dead: ${dead}</li>
      <li>Warning: ${warning}</li>
    </ul>

    ${brokenLinks.length > 0 ? `
      <h2>Action Required: Broken Links</h2>
      <ul>
        ${brokenLinks.map(link => `
          <li>
            <a href="${link.url}">${link.url}</a>
            <br>Last checked: ${new Date(link.last_checked_at).toLocaleString()}
          </li>
        `).join('')}
      </ul>
    ` : '<p>✅ All links are healthy!</p>'}
  `

  await transporter.sendMail({
    from: '"Link Monitor" <monitor@example.com>',
    to: 'stakeholders@example.com',
    subject: `Link Health Report - Week of ${new Date().toLocaleDateString()}`,
    html: emailHtml,
  })

  console.log('📧 Weekly report sent!')
}

// Schedule for Friday at 5 PM
const cron = require('node-cron')
cron.schedule('0 17 * * 5', sendWeeklyReport)
Automated issue creation (GitHub example):
const { Octokit } = require('@octokit/rest')

async function createIssuesForBrokenLinks() {
  const octokit = new Octokit({
    auth: process.env.GITHUB_TOKEN
  })

  const brokenLinks = await fetchBrokenLinks()  // Uses DeadLinkRadar API

  for (const link of brokenLinks) {
    await octokit.rest.issues.create({
      owner: 'your-org',
      repo: 'your-repo',
      title: `🔴 Broken Link: ${link.url}`,
      body: `
The following link is returning \`${link.http_status_code}\`:

**URL:** ${link.url}
**Last Checked:** ${link.last_checked_at}
**Uptime:** ${link.uptime_percentage}%

Please investigate and fix ASAP.
      `,
      labels: ['bug', 'broken-link']
    })
  }

  console.log(`Created ${brokenLinks.length} GitHub issues`)
}
Pro Tips for Production Use
After integrating the API into hundreds of workflows, we've identified patterns that separate reliable integrations from flaky ones. These tips will save you debugging time and prevent common pitfalls.
Tip 1: Use Separate API Keys Per Environment
Why: If your staging key gets compromised (e.g., accidentally committed to public repo), you can revoke it without affecting production. When rotating keys, you can test new keys in staging before updating production.
Naming convention:
production-server-2026-01
staging-api-key
dev-local-john
ci-github-actions
Environment variable pattern:
# .env.production
DEADLINKRADAR_API_KEY=dlr_sk_live_prod_xxxxxxxxxxxxxx

# .env.staging
DEADLINKRADAR_API_KEY=dlr_sk_live_staging_xxxxxxxxxxxxxx

# .env.development (local)
DEADLINKRADAR_API_KEY=dlr_sk_live_dev_xxxxxxxxxxxxxx
Tip 2: Implement Exponential Backoff for Rate Limits
Why: If you hit the rate limit (10,000 requests/hour), retrying immediately will fail again. Exponential backoff gives your quota time to reset while reducing load on our servers.
Implementation (JavaScript):
async function retryWithExponentialBackoff(fn, maxRetries = 5) {
  let lastError

  for (let attempt = 0; attempt < maxRetries; attempt++) {
    try {
      return await fn()
    } catch (error) {
      lastError = error

      // Only retry on rate limit errors
      if (error.response?.status !== 429) {
        throw error
      }

      if (attempt < maxRetries - 1) {
        const waitTime = Math.min(Math.pow(2, attempt) * 1000, 32000)  // Max 32s
        const jitter = Math.random() * 1000  // Add randomness

        console.log(`Rate limited. Retrying in ${waitTime + jitter}ms...`)
        await new Promise(resolve => setTimeout(resolve, waitTime + jitter))
      }
    }
  }

  throw lastError
}

// Usage
const result = await retryWithExponentialBackoff(() =>
  api.get('/links/abc123/status')
)
Backoff schedule:
- Attempt 1: Wait 1 second
- Attempt 2: Wait 2 seconds
- Attempt 3: Wait 4 seconds
- Attempt 4: Wait 8 seconds
- Attempt 5: Wait 16 seconds
- Attempt 6+: Wait 32 seconds (capped)
Tip 3: Cache Successful Checks
Why: Links rarely break within minutes. If a link is active at 10:00 AM, it's probably still active at 10:05 AM. Caching reduces API calls and preserves rate limit quota for new checks.
Cache duration recommendations:
- Active links: 1 hour
- Recently recovered links: 15 minutes
- Dead links: 5 minutes (verify recovery quickly)
- Critical links: 10 minutes (more frequent verification)
Redis caching example:
const redis = require('redis')
const client = redis.createClient()

async function checkLinkWithRedisCache(linkId) {
  const cacheKey = `link:${linkId}:status`

  // Try cache first
  const cached = await client.get(cacheKey)
  if (cached) {
    console.log(`Cache hit: ${linkId}`)
    return JSON.parse(cached)
  }

  // Cache miss - fetch from API
  console.log(`Cache miss: ${linkId}`)
  const response = await api.get(`/links/${linkId}/status`)
  const data = response.data

  // Cache based on status
  const ttl = data.status === 'active' ? 3600 : 300  // 1h active, 5m dead
  await client.setEx(cacheKey, ttl, JSON.stringify(data))

  return data
}
Tip 4: Set Up Webhook Alerts for Critical Links
Why: Polling wastes API calls. Webhooks push notifications the moment status changes, giving you instant alerts for critical links without constant checking.
When to use webhooks:
- Payment gateway links (lost sales if broken)
- Download links for paid content (user complaints)
- API endpoint health checks (service disruption)
When to use polling:
- Batch reports (scheduled weekly summary)
- Dashboard visualizations (user-initiated refresh)
Tip 5: Monitor Your API Usage
Why: Hitting rate limits mid-deployment breaks your CI/CD pipeline. Monitoring usage trends helps you upgrade before hitting limits or optimize inefficient code.
Check rate limit headers:
async function checkLinkWithRateLimitMonitoring(linkId) {
  const response = await api.get(`/links/${linkId}/status`)

  const remaining = response.headers['x-ratelimit-remaining']
  const limit = response.headers['x-ratelimit-limit']
  const reset = new Date(response.headers['x-ratelimit-reset'] * 1000)

  console.log(`Rate limit: ${remaining}/${limit} remaining (resets ${reset.toLocaleTimeString()})`)

  // Alert if quota dropping fast
  if (remaining < limit * 0.1) {  // Less than 10% remaining
    console.warn(`⚠️ Low rate limit quota: ${remaining}/${limit}`)
  }

  return response.data
}
Datadog metric (track usage over time):
const { StatsD } = require('hot-shots')
const dogstatsd = new StatsD()

// After each API call
dogstatsd.gauge('api.ratelimit.remaining', remaining)
dogstatsd.gauge('api.ratelimit.limit', limit)
Troubleshooting Common Issues
Even with perfect code, integrations can fail. Here's how to debug the four most common errors we see in support tickets.
"401 Unauthorized Error"
Full error message:
{
  "error": "Invalid API key",
  "message": "The provided API key is invalid or has been revoked",
  "status": 401
}
Cause: Missing, malformed, or revoked API key
Solutions:
1. Verify key format:
API keys must start with dlr_sk_live_ (production) or dlr_sk_test_ (test mode). If your key starts differently, it's malformed.
// ✅ Valid
const key = 'dlr_sk_live_xxxxxxxxxxxxxxxxxxxxxxxxxxxxxxxx'

// ❌ Invalid - missing prefix
const key = 'xxxxxxxxxxxxxxxxxxxxxxxxxxxxxxxx'
2. Check environment variable:
# Print first/last 4 chars to verify (don't print full key)
echo $DEADLINKRADAR_API_KEY | grep -o '^.....*....$'
# Should output: dlr_...xxx
3. Regenerate key:
If the key was revoked (you rotated it and forgot to update), generate a new one in Settings → API and update your environment variables.
4. Verify Authorization header:
// ✅ Correct
headers: {
  'Authorization': `Bearer ${API_KEY}`
}

// ❌ Wrong - missing "Bearer"
headers: {
  'Authorization': API_KEY
}

// ❌ Wrong - typo in header name
headers: {
  'Authorisation': `Bearer ${API_KEY}`  // British spelling
}
"429 Rate Limit Exceeded"
Full error message:
{
  "error": "Rate limit exceeded",
  "message": "You have exceeded your rate limit of 10,000 requests per hour",
  "retry_after": 3600,
  "status": 429
}
Cause: Exceeded 10,000 requests per hour (Business plan limit)
Solutions:
1. Implement exponential backoff (see Tip 2 above)
2. Add caching (see Tip 3 above)
3. Batch requests:
// ❌ Bad - 100 API calls
for (const linkId of linkIds) {
  await api.get(`/links/${linkId}/status`)
}

// ✅ Good - 1 API call
await api.post('/links/check-batch', {
  link_ids: linkIds
})
4. Check for infinite loops:
// ❌ Dangerous - infinite retry
while (true) {
  try {
    await api.get('/links/abc123/status')
    break
  } catch (error) {
    // Infinite retries on any error!
  }
}

// ✅ Safe - max 3 retries
for (let i = 0; i < 3; i++) {
  try {
    await api.get('/links/abc123/status')
    break
  } catch (error) {
    if (i === 2) throw error
  }
}
"503 Service Unavailable"
Full error message:
{
  "error": "Service temporarily unavailable",
  "message": "We're experiencing high load. Please retry in 60 seconds",
  "status": 503
}
Cause: Temporary service disruption (rare - usually during deployments or infrastructure maintenance)
Solutions:
1. Implement retry logic:
async function fetchWithRetry(url, maxRetries = 3) {
  for (let i = 0; i < maxRetries; i++) {
    try {
      return await api.get(url)
    } catch (error) {
      if (error.response?.status === 503 && i < maxRetries - 1) {
        await new Promise(resolve => setTimeout(resolve, 60000))  // Wait 60s
        continue
      }
      throw error
    }
  }
}
2. Set up status monitoring:
Subscribe to status page updates (email, Slack, webhook) to get notified of maintenance windows before they happen.
"Invalid Link Format"
Full error message:
{
  "error": "Invalid link format",
  "message": "URL must be a valid HTTP or HTTPS URL",
  "status": 400
}
Cause: Malformed URL in request body
Solutions:
1. Validate URLs before sending:
function isValidUrl(string) {
  try {
    const url = new URL(string)
    return url.protocol === 'http:' || url.protocol === 'https:'
  } catch (error) {
    return false
  }
}

// Usage
if (!isValidUrl(userInput)) {
  console.error('Invalid URL:', userInput)
  return
}

await api.post('/links', { url: userInput })
2. Common mistakes:
// ❌ Missing protocol
'example.com/download'  // Should be https://example.com/download

// ❌ Invalid protocol
'ftp://example.com/file'  // Only HTTP/HTTPS supported

// ❌ Spaces in URL
'https://example.com/my file.pdf'  // Should encode: my%20file.pdf

// ✅ Correct
'https://example.com/download'
3. Encode special characters:
const url = 'https://example.com/' + encodeURIComponent('my file.pdf')
// Result: https://example.com/my%20file.pdf
Summary: From Manual to Automated
Manual link checking doesn't scale. Whether you're managing 50 links or 5,000, clicking through dashboards wastes time that could be spent building features.
The DeadLinkRadar API transforms link monitoring from a manual chore into an automated system that catches problems before users do. You've learned how to:
- Authenticate with API keys — Generate, secure, and rotate keys safely across environments
- Make your first API call — Check link status programmatically in curl, JavaScript, and Python
- Integrate with CI/CD — Block deployments when links break using GitHub Actions, GitLab CI, and Jenkins
- Scale with batch operations — Check hundreds of links in single requests with retry logic
- Build custom workflows — Pull data into monitoring dashboards, send automated reports, create issues
Key Benefits Recap
Before automation:
- Manual link checking: 2-4 hours/week
- Discover broken links from user complaints
- No visibility into patterns or trends
- Deployment delays waiting for manual QA
After automation:
- Zero manual link checking
- Alerts before users notice
- Historical data for trend analysis
- Deployments blocked automatically if links break
Next Steps
Ready to automate your link monitoring workflow?
-
Upgrade to Business plan — API access requires Business plan subscription. Upgrade in Settings → Billing.
-
Generate your first API key — Go to Settings → API and create a key for your environment.
-
Choose an integration — Start with CI/CD (GitHub Actions example above) or custom dashboard (Datadog example).
-
Join the community — Have questions? We're here to help. Email support@deadlinkradar.com or join our community Slack.
Additional Resources
- Business Plan Pricing — Compare plans and see what's included
- Contact Support — Integration help, troubleshooting, feature requests
Stop chasing broken links. Start monitoring automatically.