
Waiting hours—or even days—for scheduled checks when you need immediate link verification is frustrating. Your marketing campaign launches in an hour, your client's website goes live tomorrow morning, or a customer reports broken downloads and you need answers now, not when the automatic checker gets around to it.
The reality is that automatic scheduled monitoring works great for routine oversight, but there are critical moments when you need control. Moments when you need to check specific links right now, adjust monitoring frequencies for different priorities, or trigger verification across your entire link inventory before a major event. Most teams discover this gap the hard way—after missing something urgent.
This guide shows you how to take control with DeadLinkRadar's batch operations and custom frequency settings. You'll learn to check links instantly on demand, set different monitoring schedules for different link priorities, and optimize your monitoring strategy to catch issues faster while controlling costs.
What You'll Need Before Getting Started
Before we dive into the details of batch operations and custom frequency settings, let's make sure you have everything you need to follow along and get the most value from this guide:
- A DeadLinkRadar account — Free or Business plan works. You can sign up here if you haven't already. The Free plan includes all batch operation features, though Business plans get higher limits for hourly checking.
- Links already added to your account — If you're just getting started, add at least 5-10 links to work with. You can use the bulk import feature to add multiple links quickly from a CSV or text file.
- Understanding of check frequency options — DeadLinkRadar offers four monitoring frequencies: hourly, daily, weekly, and monthly. We'll explain when to use each one, but having a general sense of your monitoring needs helps you make better decisions.
- Time estimate — 10-15 minutes for your first setup. Once you understand the workflow, batch operations take just seconds to execute.
Don't have links added yet? No problem! This guide includes a section on when to use different check frequencies, which will help you plan your monitoring strategy as you add links to your account.
Understanding Check Frequencies
Before we jump into manual checks and batch operations, it's important to understand how DeadLinkRadar's check frequency system works. This knowledge will help you make informed decisions about when to use manual checks versus scheduled monitoring, and how to optimize your monitoring strategy for both speed and cost.
DeadLinkRadar offers four check frequencies, each designed for different use cases. The key to an effective monitoring strategy is matching the right frequency to each link's importance and stability.

Check frequency options with detailed use cases (click to view full size)
| Frequency | Check Interval | Best For | Cost Impact |
|---|---|---|---|
| Hourly | Every hour | Mission-critical download links, payment gateways, high-traffic landing pages. Use this for links where even 1-2 hours of downtime costs you money or credibility. For example, a SaaS trial signup link or a Black Friday promotion landing page. | Highest cost per link (720 checks/month). Reserve for your most important 5-10% of links. |
| Daily | Once per day | Active content, blog post links, product pages, file hosting downloads with moderate traffic. This is the sweet spot for most links—frequent enough to catch issues quickly, but cost-effective enough to scale to hundreds of links. | Moderate cost (30 checks/month). Recommended default for most links. |
| Weekly | Once per week | Stable resources, documentation links, archived content that rarely changes. If a link has been active for 6+ months without issues, weekly checks provide good coverage without waste. | Low cost (4 checks/month). Good for bulk link libraries. |
| Monthly | Once per month | Long-term stable links, historical archives, low-priority backlinks. Use this for "set it and forget it" monitoring where immediate detection isn't critical. Perfect for reference materials or legacy content you still want to track. | Lowest cost (1 check/month). Ideal for large link inventories (500+ links). |
How Scheduled Checking Works
DeadLinkRadar runs automatic background checks based on your frequency settings. Here's what happens behind the scenes:
When you add a link and set a check frequency, our system schedules that link for verification at the next appropriate interval. For example, if you add a link at 2:15 PM and set it to hourly checking, it will first be checked at 3:00 PM, then again at 4:00 PM, and so on throughout the day.
The checking system runs continuously in the background. Each check performs multiple verification steps: testing the HTTP status, analyzing response times, detecting soft 404s (pages that return 200 but show error content), and for file hosting links, verifying actual file availability through platform-specific methods.
Results appear in your dashboard within seconds to minutes of the check completing. If a link transitions from "active" to "dead" status, you'll receive notifications through your configured channels (email, Discord, Slack, Teams, Telegram, or custom webhooks) based on your alert preferences.
When to Use Manual Checks vs. Scheduled Monitoring
Understanding the difference between manual (on-demand) and scheduled checks is crucial for an effective monitoring strategy:
Use scheduled checking when:
- You want continuous monitoring without manual intervention
- Links are relatively stable and don't change frequently
- You're monitoring hundreds or thousands of links
- Cost optimization matters (lower frequencies = lower cost)
Use manual checking when:
- You need immediate verification (pre-launch audits, user complaints)
- Links were just updated or moved
- You're troubleshooting a specific issue
- You want to verify a fix immediately after making changes
The most effective approach combines both: set appropriate scheduled frequencies for routine monitoring, then use manual checks for urgent verification. For example, you might have daily scheduled checks for your product download links, but trigger manual checks immediately before a product launch or after migrating to a new hosting provider.
How to Check Links Manually (On-Demand)
Sometimes you can't wait for the next scheduled check. Whether you're responding to a customer complaint, preparing for a launch, or verifying links after server maintenance, manual on-demand checking gives you immediate answers.
Here's how to trigger instant verification for specific links or your entire inventory.
Step 1: Navigate to Batch Operations
Log into your DeadLinkRadar dashboard and click on Batch in the sidebar navigation (or visit /dashboard/batch directly). This page is your central hub for all bulk link operations, including manual checking, frequency updates, and group assignments.
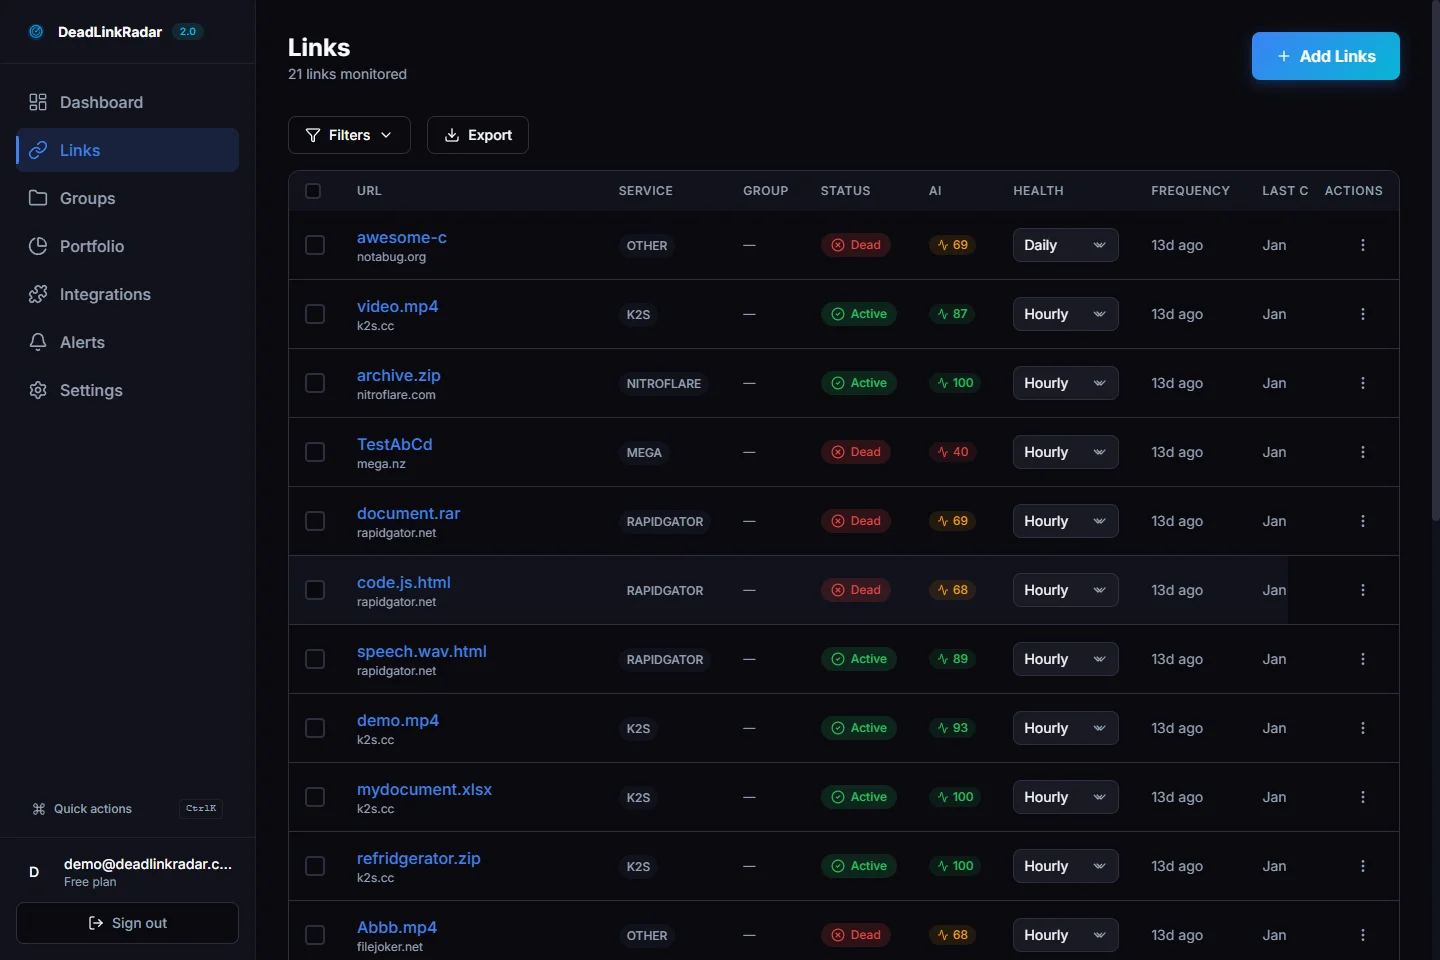
The batch operations interface shows all your links in a sortable table with filters for status, service type, and link groups. You can select individual links or use filters to select entire categories at once.

Batch operations dashboard with link selection and manual check button (click to view full size)
Step 2: Select Links for Immediate Checking
DeadLinkRadar offers multiple ways to select links for batch operations. Choose the method that best fits your use case:
Select individual links: Click the checkbox next to each link you want to verify. This works well for checking 5-10 specific links mentioned in a support ticket or after making targeted updates.
Select by filter: Use the status filter (active, dead, checking, unknown) to select all links in a particular state. For example, selecting all "unknown" status links lets you re-verify everything that failed previous checks. Service type filters let you check all links from a specific file hosting service (e.g., all K2S links) if that service reported downtime.
Select by group: If you've organized your links into groups (like "Product Downloads", "Marketing Campaigns", or "Client Sites"), you can select an entire group at once. This is powerful for pre-launch audits—just check the entire campaign group before announcing.
Select all: For comprehensive audits before major events (website launch, marketing campaign, server migration), use "Select All" to verify your entire link inventory. DeadLinkRadar can handle thousands of links in a single batch check.
Pro tip: When selecting large batches (100+ links), the system processes checks in parallel for high-speed verification. You'll see a "Checking" status appear immediately, with results updating in real-time as each link completes verification. Most batches finish within 2-5 minutes, though file hosting links may take longer due to platform-specific verification requirements.
Step 3: Trigger Manual Verification
Once you've selected your target links, click the "Check Now" button in the batch actions toolbar. The system immediately queues your selected links for verification and updates their status to "checking" in the dashboard.
The verification process typically completes in 1-5 minutes depending on batch size and link types. File hosting links take longer because the system performs platform-specific verification (checking actual file availability, not just HTTP status). As each link completes checking, the status updates (active, dead, or unknown) and a new entry is added to the check history with response time and any error details.

Success confirmation with count of links queued for checking (click to view full size)
Step 4: Monitor Check Progress and Results
After triggering the manual check, your dashboard updates in real-time as results come in. Here's how to monitor progress:
Status indicators: Each link shows its current state—"checking" means verification is in progress, "active" means the link is working, "dead" means it's broken, and "unknown" means the check encountered an error (like a timeout or network issue).
Check history: Click any link to view its detailed check history. You'll see every verification with timestamps, HTTP status codes, response times, and error messages. This history is invaluable for diagnosing intermittent issues or tracking when a link first broke.
Notifications: If you've configured alert channels (email, Discord, Slack, etc.), you'll receive real-time notifications as broken links are detected. For manual checks, we recommend setting up Discord or Slack webhooks for instant visibility—you can watch your team channel light up with results as the batch check progresses.
Filtering after checks: Once the batch completes, use the status filter to quickly jump to any newly detected broken links. This lets you prioritize fixes by immediately seeing what failed.
Worth noting: The system caches check results to avoid redundant verification. If you manually check a link, then check it again 5 minutes later, you'll see the same result without wasting API calls. The cache expires based on your check frequency setting—hourly checks cache for 1 hour, daily checks for 24 hours, etc.
Setting Custom Check Frequencies
While manual checking gives you immediate control, setting the right check frequency for each link creates a sustainable monitoring strategy that catches issues quickly without wasting resources. Here's how to optimize your link monitoring schedules.
Why Custom Frequencies Matter
Not all links are created equal. A download button on your main product page deserves hourly monitoring because downtime directly costs you customers. Meanwhile, a link to last year's holiday blog post in your site footer? Weekly checks are plenty—if it breaks, you have time to fix it before it matters.
The problem most teams face is using one-size-fits-all monitoring: either checking everything hourly (expensive, wasteful) or checking everything weekly (cheap, but you miss critical issues). Custom frequencies let you allocate monitoring resources where they matter most.
Here's the cost-benefit breakdown: Hourly checking runs 720 checks per month per link. Daily checking runs just 30 checks per month—a 24x reduction. For a library of 500 links, that's the difference between 360,000 monthly checks (if everything is hourly) versus 15,000 monthly checks (if everything is daily). The savings in both cost and system load are substantial.
The key insight is this: match check frequency to business impact. High-impact links (payment flows, critical downloads, main navigation) should be checked hourly. Medium-impact links (blog posts, product pages, documentation) work fine with daily checks. Low-impact links (archived content, historical references) need weekly or even monthly verification.
Step-by-Step: Changing Check Frequency
DeadLinkRadar makes frequency management simple. Here's how to update monitoring schedules for one link or thousands:
For a single link:
- Navigate to the batch operations page or your main links dashboard
- Find the link you want to update (use search or filters)
- Click the frequency dropdown in the link's row
- Select your desired frequency: hourly, daily, weekly, or monthly
- The change saves automatically—no confirmation needed
For multiple links:
- Go to
/dashboard/batch(batch operations page) - Select links using checkboxes, filters, or "Select All"
- Click "Update Frequency" in the batch actions toolbar
- Choose the target frequency from the dropdown
- Click "Apply" to update all selected links at once
Selecting multiple links for batch frequency updates (click to view full size)
The system updates all selected links in a single transaction, then revalidates caches so your dashboard reflects the new schedules immediately. Worth noting: changing a link's frequency doesn't trigger an immediate check. If you want to verify links right after updating frequencies, use the "Check Now" button from the previous section.
Best Practices: Matching Frequency to Link Importance
Over three years of running DeadLinkRadar, we've seen thousands of users develop monitoring strategies. Here are the patterns that work:
Hourly checking (5-10% of your links):
- E-commerce product download links (where downtime = lost sales)
- Payment gateway integrations
- Critical API endpoints for your core product
- High-traffic landing pages driving campaigns
- File hosting links with rapid turnover (daily uploads)
If losing access to a link for even 2-3 hours would significantly harm your business, check it hourly.
Daily checking (60-70% of your links):
- Blog post links and article content
- Product documentation and help center resources
- Standard file hosting downloads (moderate traffic)
- Portfolio or showcase content
- Internal navigation links
- Social media links and embeds
Daily checks catch issues quickly enough that you can fix them before they cause serious problems, while remaining cost-effective for hundreds of links.
Weekly checking (20-25% of your links):
- Archived blog content (>1 year old)
- Historical reference materials
- Stable long-term resources
- Backlinks to your content on other sites
- Footer links and tertiary navigation
If a link has been active for 6+ months without issues, weekly checks provide good coverage.
Monthly checking (5-10% of your links):
- Long-term archival content (>2 years old)
- Legacy documentation you maintain but rarely update
- Low-priority backlinks
- Reference materials that never change
Use monthly checking for "set it and forget it" monitoring where immediate detection isn't critical. This lets you track large link inventories (500-1000+ links) without ballooning costs.
Pro tip: Review and adjust frequencies quarterly. Links that start as high-priority (hourly) often stabilize over time and can be downgraded to daily or weekly. Conversely, seasonal content might need frequency increases during peak periods.
Cost Optimization Strategy
Want to monitor more links without increasing costs? Here's how to optimize your monitoring budget:
Start conservative, then escalate: When adding new links, start with weekly checking. After 2-3 weeks, if the link proves stable (no failures, consistent response times), keep it weekly or even drop to monthly. If you see failures or intermittent issues, escalate to daily or hourly.
Use link groups for batch frequency management: Organize links into groups like "Mission Critical", "High Priority", "Standard", and "Archive". This lets you apply frequency changes to entire categories at once. For example, during a holiday sale, escalate your entire "Product Downloads" group from daily to hourly, then drop back to daily after the event.
Leverage alerts strategically: Instead of checking everything hourly "just to be safe", check most links daily but set up multi-channel alerts (email + Discord + Slack). When something breaks, you'll know within hours instead of minutes, but you're spending 24x less on monitoring.
Seasonal frequency adjustments: Increase frequencies for links tied to time-sensitive campaigns (Black Friday sales, product launches, webinar registrations), then drop back to standard frequencies after the event. DeadLinkRadar makes this easy with batch frequency updates.
Monitor the monitors: Check your portfolio dashboard regularly to see which links have the highest failure rates. Links that break frequently deserve higher check frequencies, while links with perfect uptime records can be checked less often.
Real-World Use Cases
Theory is helpful, but seeing how real teams use batch operations and custom frequencies makes the value concrete. Here are five scenarios we see regularly.
Pre-Launch Audits: Checking Everything Before Going Live
You're launching a new product page tomorrow. The design is finalized, content is approved, and marketing emails are scheduled. The last thing you need is broken download links or dead documentation references making you look sloppy.
The workflow:
- Navigate to
/dashboard/batch - Filter links to show only those in the "Product Launch" group (assuming you've organized your links)
- Click "Select All" to grab every link in that group
- Click "Check Now" to trigger immediate verification
- Wait 2-3 minutes while checks complete
- Filter by status "dead" to see any issues
- Fix broken links, then re-check to confirm
This pattern works for any pre-launch scenario: website redesigns, domain migrations, major content updates, or seasonal campaign launches. The key is organizing your links into groups ahead of time so you can check entire categories in one click.
One e-commerce client uses this workflow before every major sale. They have a "Black Friday 2026" group containing all product links, payment gateway endpoints, and campaign landing pages. 24 hours before the sale goes live, they batch-check the entire group, fix any issues, then check again 2 hours before launch. They've never had a broken link during a major sale since implementing this process.
Post-Deployment Verification: Confirming Links After Code Changes
Your development team just pushed a major update to production. Database migrations ran smoothly, tests passed in staging, but you know from experience that things can break unexpectedly when code ships.
The workflow:
- Identify which parts of your application changed (e.g., payment flow, user onboarding, documentation)
- Go to batch operations and select all links related to those areas
- Trigger manual checks to verify everything still works
- If any links show "dead" or "unknown", investigate immediately
- Once fixed, re-check to confirm
For developers deploying frequently, this becomes a post-deployment ritual: ship to production → batch check affected links → confirm results → move on. It takes 5 minutes but catches issues before customers do.
Advanced tip: If you're using the DeadLinkRadar API (Business plan feature), you can automate this by triggering batch checks from your CI/CD pipeline. After each deployment, your pipeline can call the API to check all links in the affected area and fail the deployment if any are broken.
Crisis Response: Immediate Verification When Users Report Issues
A customer opens a support ticket: "Your download link doesn't work." You need to know immediately: is it broken for everyone, or just this user?
The workflow:
- Find the specific link mentioned in the support ticket
- Trigger a manual check to verify current status
- View check history to see when it last worked
- If it's broken, check related links to see if it's a systemic issue or isolated problem
- Fix the issue and re-check to confirm before responding to the customer
Manual checking turns a 30-minute investigation ("let me check this and get back to you") into a 2-minute resolution ("I just verified—it's working now. Can you try again?"). The faster you respond with actual verification, the better the customer experience.
One SaaS company uses this for their file hosting downloads. When users report broken download links, support agents have a bookmark directly to /dashboard/batch?search=[ticket URL] that filters to the specific link. They check it immediately, see the current status and error details, and can respond to customers with concrete information instead of "we're looking into it."
Seasonal Campaigns: Higher Frequency During High-Traffic Periods
You're running a limited-time webinar registration. For the next 3 days, that registration link is your highest-priority asset—if it breaks for even an hour, you lose registrations and revenue.
The workflow:
- Before the campaign: Select the campaign link(s) and increase frequency from daily to hourly
- During the campaign: Monitor your alerts channel (Discord/Slack) for any failure notifications
- If something breaks: Manual check immediately, fix the issue, then manual check again to confirm
- After the campaign: Drop frequency back to daily or weekly
This pattern works for any time-limited campaign: sales events, product launches, webinar series, seasonal promotions, or conference registrations. Temporarily escalating monitoring frequency during high-stakes periods is much cheaper than maintaining hourly checks year-round.
One content creator uses this for their course launches. During launch week, they set all course links (payment pages, download links, bonus resources) to hourly checking. After launch week, when sales slow down, they drop to daily checking. This gives them peace of mind during the critical window without paying for hourly checks indefinitely.
Cost Optimization: Monthly Checks for Archived Content
You have 500 blog posts from the last 5 years. Most links in older content are stable—they've been working for months or years without issues. Checking them daily wastes both money and system resources.
The workflow:
- Filter links by last-checked date (e.g., "last checked > 90 days ago" and "status = active")
- Select all links that meet the criteria
- Batch update frequency to monthly
- Set up a quarterly review to re-evaluate these links
This frees up your monitoring budget to focus on active, high-priority content. If a link in archived content breaks, you'll discover it within a month—which is acceptable for content that's no longer driving traffic.
One digital publisher manages 2,000+ article links this way. Current month's content: hourly. Last 3 months: daily. Last year: weekly. Older than 1 year: monthly. This tiered approach lets them monitor a massive link library while keeping costs reasonable.
Pro Tips
After helping thousands of users set up effective link monitoring strategies, we've collected best practices that maximize the value of batch operations and custom frequencies.
Combine Batch Operations with Link Groups
Link groups are DeadLinkRadar's organizational system for categorizing your links. Setting up groups lets you perform batch operations on entire categories at once, rather than selecting links individually or using filters.
Here's how to leverage groups for batch operations:
Create strategic groups: Instead of generic names like "Group 1" or "Miscellaneous Links", use descriptive labels that map to your monitoring needs: "Product Downloads", "Blog Content", "Payment Flows", "Client Sites", "Seasonal Campaigns". This makes batch operations much more intuitive.
Use groups for frequency tiers: Create groups like "Mission Critical (Hourly)", "High Priority (Daily)", "Standard (Weekly)", and "Archive (Monthly)". As you add new links, assign them to the appropriate tier. When you need to adjust frequencies, just select the entire group.
Leverage groups for pre-launch audits: Before major events, create a temporary group containing all related links. For a product launch, this might include the landing page, payment gateway, download links, documentation, and support resources. Check the entire group with one click.
Batch assign links to groups: On the batch operations page, you can select multiple links and assign them all to a group at once. This is faster than individually categorizing links as you add them.
Pro tip: Use color-coded group labels to visualize priority at a glance. Most users assign red to mission-critical links, yellow to high-priority, blue to standard, and gray to archived content.
Reserve Hourly Checks for Mission-Critical Links Only
Hourly checking generates 720 checks per month per link—24x more than daily checking. This has real cost implications at scale.
Here's our recommended guideline: no more than 5-10% of your link inventory should use hourly checking. For most users, this means 5-50 links, even if you're monitoring thousands.
Which links qualify for hourly checking?
- Payment gateway integrations (where 1 hour of downtime = lost revenue)
- Critical download buttons on high-traffic landing pages
- API endpoints that power your core product
- File hosting links with hundreds of daily downloads
- Links that historically break frequently (>5 failures per month)
Which links don't need hourly checking?
- Blog post content (readers will usually try again later if a link breaks)
- Documentation links (developers can wait a few hours for a fix)
- Footer navigation links (low traffic, low urgency)
- Archive content (breaking won't be noticed immediately)
If you find yourself wanting to check more than 10% of your links hourly, you probably need better alert configuration, not more frequent checks. Set up Discord/Slack/Teams webhooks so you're notified immediately when something breaks, then you can respond quickly even with daily checking.
Set Up Alerts to Notify Immediately After Manual Checks
Manual checks are most valuable when paired with real-time notifications. Here's how to configure this:
- Go to
/dashboard/settings/notifications - Enable at least one instant notification channel: Discord, Slack, Teams, or Telegram webhooks are ideal for real-time alerts (email works but often has 5-10 minute delays)
- Configure alert preferences to include "Link status changed to dead"
- Enable batching if you're checking large numbers of links (otherwise you'll get one notification per broken link, which can spam your channel)
Now when you trigger a batch check, your team channel will light up with results as broken links are detected. This is especially useful during pre-launch audits or crisis response—you can trigger a check on 100 links, then watch your Discord channel to see if anything fails, all without refreshing the dashboard.
Advanced tip: Create dedicated Discord or Slack channels for different link groups. For example, "#alerts-product-downloads" receives notifications only for links in your product download group, while "#alerts-blog-content" receives blog link alerts. This prevents alert fatigue and helps teams focus on what matters to them.
Schedule Manual Checks Before Marketing Campaigns
Don't wait until the morning of a major campaign to verify your links. Build pre-launch checking into your campaign workflow.
Here's a recommended timeline for campaign launches:
T-minus 48 hours: First batch check of all campaign links. This gives you time to identify and fix issues without panicking.
T-minus 24 hours: Second batch check after fixes. Confirm everything works.
T-minus 2 hours: Final batch check right before the campaign launches. This catches any last-minute issues from code deployments or configuration changes.
T-plus 1 hour: Post-launch batch check to verify everything is still working under real traffic loads. Sometimes links work fine in testing but fail when hundreds of users hit them simultaneously.
For recurring campaigns (weekly newsletters, daily social media posts), create a checklist that includes batch checking as a standard step. Many users automate this with API calls—their campaign scheduler triggers a batch check via the DeadLinkRadar API and won't send the campaign unless all links pass verification.
Pro tip: If you're using email marketing platforms like Mailchimp or ConvertKit, batch check all links in your email template before scheduling the send. Broken links in emails can't be fixed retroactively, so pre-send verification is critical.
Troubleshooting
Even with a well-configured monitoring system, you'll occasionally encounter issues. Here's how to diagnose and resolve the most common problems.
"Manual Check Not Starting"
Symptoms: You click "Check Now" but links remain in their previous status instead of changing to "checking". No results appear after 5-10 minutes.
Causes and solutions:
-
Verify link selection: Ensure you actually selected links before clicking "Check Now". It's easy to click the button without selecting anything, which results in a successful operation (checking 0 links) but no visible changes.
-
Check permissions: If you're using shared accounts or teams features, verify you have permission to check the selected links. You can only check links you own or have been granted access to.
-
Browser cache issues: Hard refresh the page (Ctrl+Shift+R on Windows, Cmd+Shift+R on Mac). Sometimes the UI doesn't reflect the updated status until you refresh.
-
Wait for processing: The system processes checks automatically. Give it 5-10 minutes to complete, especially for large batches or file hosting links.
If none of these solutions work, contact support@deadlinkradar.com with the link IDs you were trying to check and approximate timestamp. We can review server logs to diagnose the issue.
"Frequency Change Not Saving"
Symptoms: You update a link's frequency from daily to hourly, but when you refresh the page, it shows daily again. The change doesn't persist.
Causes and solutions:
-
Refresh the page: Changes save to the database immediately, but your browser might be showing cached data. Hard refresh (Ctrl+Shift+R / Cmd+Shift+R) to load the latest version.
-
Check for errors in the browser console: Right-click anywhere on the page, select "Inspect", click the "Console" tab, and look for red error messages. If you see a 403 Forbidden or 401 Unauthorized error, you don't have permission to update that link. If you see a 422 Validation Error, the frequency value might be invalid (this usually only happens if you're using the API directly).
-
Verify link ownership: You can only update frequencies for links you own. If you're working with shared links or someone else's account, you'll need the owner to make frequency changes.
-
Batch update vs. individual update: If you're updating multiple links at once, ensure you're using the batch update feature (select links → "Update Frequency" → choose frequency → "Apply"). Individual row-level dropdown changes save automatically, but batch updates require clicking "Apply".
-
Database replication lag: In rare cases during high traffic, there's a 1-2 second delay between saving a change and seeing it reflected in the UI. Wait 5 seconds and refresh—if the change still doesn't appear, there's a deeper issue.
If the problem persists, try updating via the batch operations page instead of the main links dashboard. The batch interface uses a different code path and sometimes works when the main page doesn't.
"Batch Operation Failed"
Symptoms: You select 100+ links, click "Check Now", and see an error message: "Batch operation failed" or "Some links could not be checked".
Causes and solutions:
-
Reduce batch size: While DeadLinkRadar can theoretically handle thousands of links in a single batch, practical limits exist. If you're checking more than 500 links at once, try breaking it into smaller batches (100-200 links each). This is especially important for file hosting links, which take longer to verify.
-
Check for invalid links: If your batch includes links that were recently deleted or that you no longer have access to, the operation might fail partway through. Filter your selection to exclude "deleted" status links before batching.
-
Network timeouts: Very large batches can timeout if they take longer than the system's maximum request duration (usually 60 seconds for the initial queuing step). The solution is the same: smaller batches.
-
System capacity: During periods of high usage, very large batches may process more slowly. The system will still complete all checks, but it may take longer. Wait a few minutes and try again, or break the batch into smaller chunks.
-
Retry failed operations: If a batch partially succeeds (some links checked, others didn't), you can identify the failed links by filtering for "unknown" status, then retry just those links.
If batch operations consistently fail at a certain size (e.g., always fails above 250 links), contact support. This might indicate a configuration issue with your account.
"Links Stuck in 'Checking' Status"
Symptoms: You triggered a batch check 15+ minutes ago, but some links still show "checking" status instead of "active", "dead", or "unknown".
Causes and solutions:
-
File hosting verification delays: Links to file hosting services (K2S, Nitroflare, Mega, etc.) take longer to verify because the system performs platform-specific checks beyond HTTP status. These can take 5-10 minutes per link in some cases. Wait 20-30 minutes before assuming something is wrong.
-
Network timeouts: If a target server is slow to respond or unreachable, the check might timeout. The system will eventually mark these as "unknown" status, but it can take 10-15 minutes. Patience is key here.
-
Processing delays: In rare cases, links can get stuck in "checking" status. Solution: Select the stuck links and trigger another manual check. The second attempt usually succeeds because whatever caused the first delay (network blip, temporary overload) has resolved.
-
Manual status reset: If links have been stuck for more than 30 minutes, contact support. We can manually reset the status to "unknown" so you can retry the check.
-
Check for system status: Visit the DeadLinkRadar status page (status.deadlinkradar.com if available) or check our Twitter/Discord for any announced incidents. During rare system outages, checks might queue but not process immediately.
As a workaround, you can usually get useful information even from stuck checks by viewing the link's detailed page. Click the link to see its history—there might be recent successful checks showing the actual status, even if the "checking" flag didn't clear properly.
Summary
Batch operations and custom check frequencies transform DeadLinkRadar from a passive monitoring tool into an active verification system you control.
Key takeaways:
-
Manual checks provide on-demand verification — No more waiting for scheduled checks when you need answers now. Pre-launch audits, crisis response, and post-deployment verification all become instant operations instead of hours-long waits.
-
Custom frequencies optimize cost and coverage — Match monitoring intensity to link importance. Hourly checks for mission-critical links, daily for standard content, weekly for stable resources, monthly for archives. This tiered approach lets you monitor thousands of links affordably.
-
Batch operations scale to any inventory size — Whether you're checking 10 links for a small website or 10,000 links for an enterprise content library, the same workflow applies: select, configure, execute. Parallel processing makes even massive batches finish in minutes.
-
Strategic monitoring beats constant checking — The most effective approach combines scheduled monitoring for routine oversight with manual checks for urgent verification. Add real-time alerts (Discord, Slack, Teams) and you'll know about issues immediately without paying for hourly checks across your entire inventory.
Next steps:
-
Audit your current frequencies: Log into DeadLinkRadar and review how many links you have at each frequency tier. Are you over-checking stable links? Under-checking critical ones? Use the batch operations page to rebalance your monitoring strategy.
-
Set up link groups: Create categories for your most important link types (product downloads, marketing campaigns, blog content, etc.). This makes batch operations much more efficient.
-
Configure alerts: Enable at least one real-time notification channel so you're alerted immediately when checks detect broken links. Discord and Slack work best for instant visibility.
-
Try a pre-launch audit: Next time you deploy code or launch a campaign, batch-check all related links before announcing publicly. Experience the peace of mind that comes from verified links.
-
Explore the portfolio analytics dashboard: Use
/dashboard/portfolioto understand your link composition by service type, status distribution, and check frequency. These insights help you further optimize your monitoring strategy.
Questions about batch operations, custom frequencies, or link monitoring strategy? We're here to help. Reach us at support@deadlinkradar.com or in our Discord community.
Related Guides
- How to Set Up Broken Link Alerts - Get notified instantly when links fail
- Portfolio Analysis Dashboard - Analyze link health and optimize monitoring
- Organize Links with Groups - Categorize links for easier management
- Link Status History Tracking - Understand when and why links break
Sources
Research for this guide included analysis of competing tools and industry best practices: